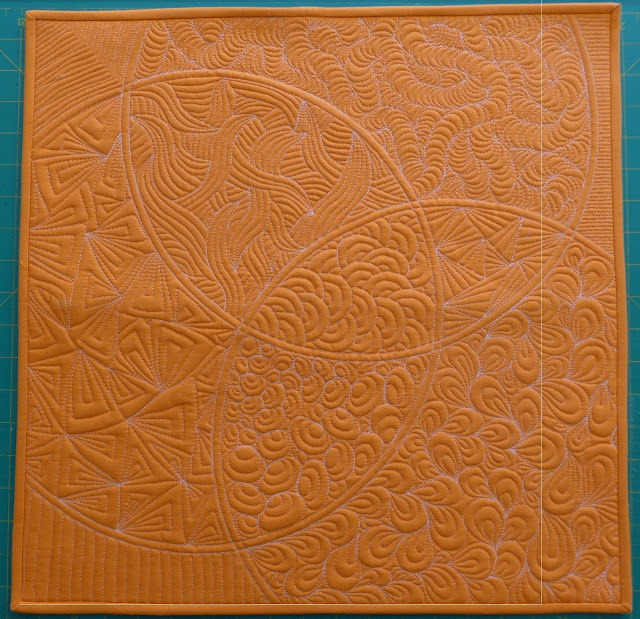
This year I finished 17 quilts (I think - may need to edit this later - not all posted here) and 23 minis (cushions) and one bag, including 3 epic (200+ hours months of work) quilts. Plus I quilted 4 quilts for others on the long arm and one mini on my domestic.
Two BOS in AMQF and Tasmanian state show, first place and 3rd place ribbons from Quiltcon, 1st place modern, 1st place innovative large and judges choice at AMQF, 1st & 2nd place modern, 1st place small proffessional and 1st place domestic machine quilting at Tasmanian State show. Also won 2nd place minimal at Australian Modern quilt show and had two quilts accepted to Quiltcon 2017.
Three quilts sold - at Quiltcon.
Started working and teaching at Quarter Inch quilting shop and wrote my first quilting pattern.
Wrote my first pattern for Modern Quilts unlimited - a paid publication.
Bought an A1 Elite long arm quilting machine and finally started learning to use it.
The highlight of my year was attending AMQF where I took lots and lots of classes and improved and expanded my machine quilting, had a great time rooming with Jess Frost and meet lots of inspiring international teachers such as Kathleen Riggins, Bethanne Nemesh & Claudia Pfeil.
Also entered my first AQS show but unfortunately was rejected ... need to work harder in 2017 to get better at technical execution of my ideas.
Saturday, 31 December 2016
Monday, 26 September 2016
turn a mini quilt into a zippered cushion
Having made 17 cushions this month out of my class samples for FMQ boot camp and bias binding techniques classes I thought I would post the method I used to create cushions out of these mini quilt samples.
The requirements for this method are based on a 20 inch quilt sandwitch that results in a 18 inch square cushion - for other sizes adjust your backing fabric, binding fabric and zipper length to suit.
REQUIREMENTS:
1.
With right sides together line up one 20inch
edge of backing fabric and mark a ½ inch seam line.
2.
Measure in 2 inches from each end and mark,
there should be a 16 inch space between the marks on either end of your
seamline.
3.
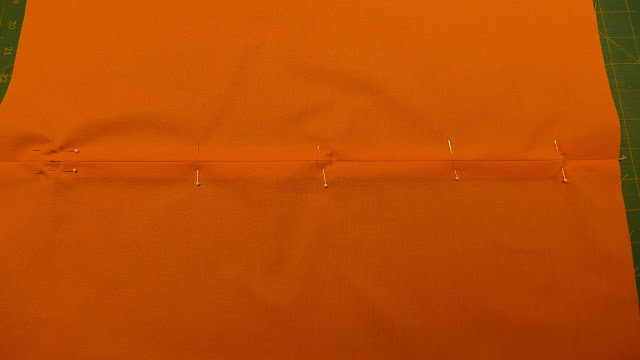
Pin at intervals to keep edges of fabric
together.
4.
Sew from each end of fabric using a short stitch
length (2-2.5 on most machines) up to 2 inch marks then take a few backstitches to secure each
end.
5.
Sew between the marks using the longest stitch
length on your machine (4-5 on most machines).
6.
Press the entire seam open.
7.
With the seam allowance facing up lay the zipper
in the center of the backing ensuring the same amount of fabric shows at each
end of the zip and the zip runs along the seam you have just sewn.
8.
Pin in place from the back then turn over to
right side and pin from the front.
Remove pins from the back side as these will not be easy to remove when
sewing in zipper.
10.
Lay your quilted square right side up and mark
out an 18 ½ inch square – this will be the edge of your cushion including the
binding.
11.
Place wrong sides of your quilted square and
prepared zippered back together – line up carefully to ensure that the zipper
is centrally positioned relative to the 18 ½ inch square you marked in step 10
13.
Using an ordinary foot sew all the way around
the 18 ½ inch square marked on the quilted front using a short stitch length (2
– 2.5) joining the zippered back to the quilted front.
14.
Fold your strip of binding fabric in half with
wrong sides together and press.
15.
With quilted front up line up the raw edge of
your binding with the line of stitching joining the front to the back –
position the end of the bind around the center and pin in place.
16.
Sew the binding on at a scant ¼ inch from the
raw edge starting about 3 inches from the first corner of the quilt – stop
sewing ¼ inch from the corner of the original stitching and take a few
backstitches to secure.
17.
Fold the binding back at a 90° angle to the seam you
just sewed forming a 45°
fold in the fabric – fingerpress this fold.
18.
Fold the binding back along the corner lining up
the raw edge again with the line of stitching, finger press this fold and pin
in place.
19.
From the edge of the quilt sew a scant ¼ inch
from the raw edge until you reach ¼ inch from the next corner then stop and
backstitch to secure.
20.
Repeat for next 2 corners of quilt.
21.
On the last corner fold and pin binding as
before and lay binding along sewn line where you will sew it.
22.
Lining up the two ends of unsecured binding trim
so they overlap by only ¼ inch.
23.
Open out the binding and pin ends together and
sew using a ¼ inch seam – folding your quilt in half when you do this will
allow you to pull the binding away from the quilt to pin and join it.
24.
Finger press the seam in the binding open (or to
the side) and fingerpress the fold in the binding so it is a continuous length.
25.
Pin binding in place lining up raw edge with
line of stitching then from the edge of the quilt and sew a scant ¼ inch seam
to attach binding overlapping with the first seam by an inch.
26.
Using scissors cut along the stitchline lined up
with the raw edge of the binding being careful not to cut off the corners of
the binding.
27.
From the front of the quilt press the binding
away from the quilt using the point of the iron to get into the corners.
28.
From the back of the quilt press the binding
over on the two opposite edges that do not contain the zipper ends. Either pin in place along the ditch from the
front of the quilt or fix in place with a thin line of Roxannes glue.
29.
Repeat for edges containing the zip.
30.
From the front side of the quilt stitch in the
ditch between the quilt and binding to secure the binding at the back.
31.
Using a quick unpick remove long stitching
keeping the seam closed over the zipper.
32.
Unzip and place an 18 inch cushion inside cover.
The requirements for this method are based on a 20 inch quilt sandwitch that results in a 18 inch square cushion - for other sizes adjust your backing fabric, binding fabric and zipper length to suit.
REQUIREMENTS:
- 18 inch square mini quilt not yet bound with 1 inch boarder (total size 20 inch square).
- 2 pieces of backing fabric 10 ½ inches x 20 inches
- 16 inch dress zip matching backing fabric
- 80 inches of 2 ¼ inch binding fabric cut on bias or straight grain.
- Thread to match backing fabric and binding.
- Fabric marking pen or pencil
- Roxannes liquid glue (optional)
- 24 inch quilting ruler
- Sewing machine with zipper foot
- Fabric scissors & Pins
- Iron & ironing board
METHOD:
9.
Using thread that matches the backing fabric sew
from the front side down each side and across the top and bottom keeping your stitches about ¼ inch from the
seamline.
12.
Pin through all layers at each corner and in the
center of each edge.
Thursday, 22 September 2016
Thursday, 15 September 2016
Sunday, 26 June 2016
Wednesday, 16 March 2016
Monday, 7 March 2016
Improv bias applique - AMQF challenge quilt
After 4 years of hard labour my Pfaff Grand Quilter has final developed a problem and shreading my most reliable thread when FMQ.
When I asked the Iching a few weeks ago if I should buy a long arm and it told me "you have exhausted your old self and can only move forward with your new self" ... maybe it meant my quilting machine rather than me.
So after such a frustrating day yesterday of trying everything to fix the thread shreading today I took it to be serviced and repaired and decided to do some nice relaxing improv applique for my AMQF challenge quilt .... now just need to think of how this fits in with the "celebrate" theme.
Subscribe to:
Comments (Atom)


