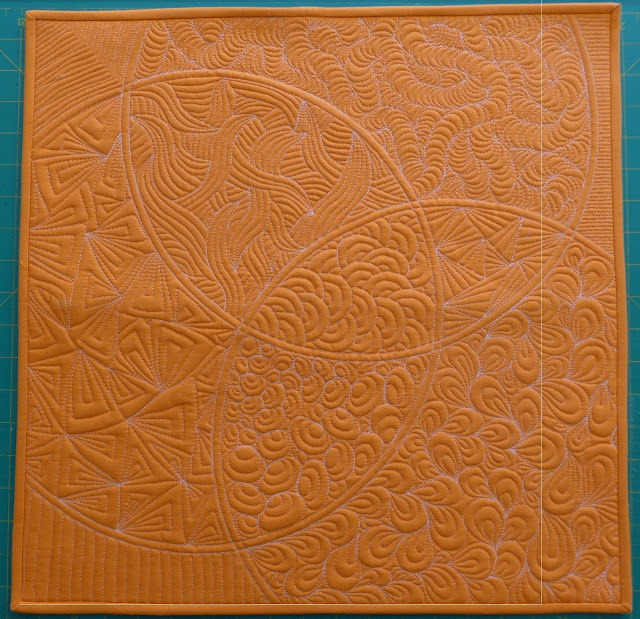
Having made 17 cushions this month out of my class samples for FMQ boot camp and bias binding techniques classes I thought I would post the method I used to create cushions out of these mini quilt samples.
The requirements for this method are based on a 20 inch quilt sandwitch that results in a 18 inch square cushion - for other sizes adjust your backing fabric, binding fabric and zipper length to suit.
REQUIREMENTS:
- 18 inch
square mini quilt not yet bound with 1 inch boarder (total size 20 inch
square).
- 2 pieces of
backing fabric 10 ½ inches x 20 inches
- 16 inch
dress zip matching backing fabric
- 80 inches of
2 ¼ inch binding fabric cut on bias or straight grain.
- Thread to
match backing fabric and binding.
- Fabric
marking pen or pencil
- Roxannes
liquid glue (optional)
- 24 inch
quilting ruler
- Sewing
machine with zipper foot
- Fabric
scissors & Pins
- Iron &
ironing board
METHOD:
1.
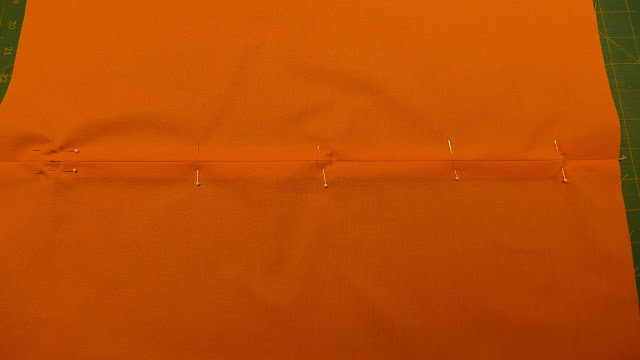
With right sides together line up one 20inch
edge of backing fabric and mark a ½ inch seam line.
2.
Measure in 2 inches from each end and mark,
there should be a 16 inch space between the marks on either end of your
seamline.
3.
Pin at intervals to keep edges of fabric
together.
4.
Sew from each end of fabric using a short stitch
length (2-2.5 on most machines) up to 2 inch marks then take a few backstitches to secure each
end.
5.
Sew between the marks using the longest stitch
length on your machine (4-5 on most machines).
6.
Press the entire seam open.
7.
With the seam allowance facing up lay the zipper
in the center of the backing ensuring the same amount of fabric shows at each
end of the zip and the zip runs along the seam you have just sewn.
8.
Pin in place from the back then turn over to
right side and pin from the front.
Remove pins from the back side as these will not be easy to remove when
sewing in zipper.
9.
Using thread that matches the backing fabric sew
from the front side down each side and across the top and bottom keeping your stitches about ¼ inch from the
seamline.
10.
Lay your quilted square right side up and mark
out an 18 ½ inch square – this will be the edge of your cushion including the
binding.
11.
Place wrong sides of your quilted square and
prepared zippered back together – line up carefully to ensure that the zipper
is centrally positioned relative to the 18 ½ inch square you marked in step 10
12.
Pin through all layers at each corner and in the
center of each edge.
13.
Using an ordinary foot sew all the way around
the 18 ½ inch square marked on the quilted front using a short stitch length (2
– 2.5) joining the zippered back to the quilted front.
14.
Fold your strip of binding fabric in half with
wrong sides together and press.
15.
With quilted front up line up the raw edge of
your binding with the line of stitching joining the front to the back –
position the end of the bind around the center and pin in place.
16.
Sew the binding on at a scant ¼ inch from the
raw edge starting about 3 inches from the first corner of the quilt – stop
sewing ¼ inch from the corner of the original stitching and take a few
backstitches to secure.
17.
Fold the binding back at a 90° angle to the seam you
just sewed forming a 45°
fold in the fabric – fingerpress this fold.
18.
Fold the binding back along the corner lining up
the raw edge again with the line of stitching, finger press this fold and pin
in place.
19.
From the edge of the quilt sew a scant ¼ inch
from the raw edge until you reach ¼ inch from the next corner then stop and
backstitch to secure.
20.
Repeat for next 2 corners of quilt.
21.
On the last corner fold and pin binding as
before and lay binding along sewn line where you will sew it.
22.
Lining up the two ends of unsecured binding trim
so they overlap by only ¼ inch.
23.
Open out the binding and pin ends together and
sew using a ¼ inch seam – folding your quilt in half when you do this will
allow you to pull the binding away from the quilt to pin and join it.
24.
Finger press the seam in the binding open (or to
the side) and fingerpress the fold in the binding so it is a continuous length.
25.
Pin binding in place lining up raw edge with
line of stitching then from the edge of the quilt and sew a scant ¼ inch seam
to attach binding overlapping with the first seam by an inch.
26.
Using scissors cut along the stitchline lined up
with the raw edge of the binding being careful not to cut off the corners of
the binding.
27.
From the front of the quilt press the binding
away from the quilt using the point of the iron to get into the corners.
28.
From the back of the quilt press the binding
over on the two opposite edges that do not contain the zipper ends. Either pin in place along the ditch from the
front of the quilt or fix in place with a thin line of Roxannes glue.
29.
Repeat for edges containing the zip.
30.
From the front side of the quilt stitch in the
ditch between the quilt and binding to secure the binding at the back.
31.
Using a quick unpick remove long stitching
keeping the seam closed over the zipper.
32.
Unzip and place an 18 inch cushion inside cover.


